Creative activity:
Unfolding Adventures
In this activity, you’ll be creating a map of a place special to you, thinking about a journey.
It could be somewhere you’ve been before, a place you’ve yet to visit, a magical made-up place, or it might unfold as you start making.
Perhaps there’ll be bumpy roads, high mountains, stormy waters and high winds to navigate on your map. How will you then carve out routes to safety and sanctuary while shaping your imaginary special place? You could add cosy caves, tempting tree houses, homely houseboats, lush forests, and dreamy beaches.
Process: Zine-Making; Map-Making; Mixed Media; Painting; Mark-Making; Collage; Storytelling
Making a ‘zine’ (pronounced ‘zeen’) is an cheap and effective way of making an artist’s book. Your zine is going to be your vehicle for exploring map-making as an artform.
Get ready to take your imagination on a mixed-media creative adventure!
What you'll need
-
- Large sheet of paper of your choice (A2, A3 or A4 is fine) – this will become your zine/map
- Smaller sheets of paper for making notes and experimenting with paint
- Different colours of acrylic paints
- Palette – could be old yoghurt pot(s) or plastic container(s)
- Paintbrush
- Jar of water
- Selection of natural mark-making tools (small sticks and twigs, pinecones, leaves and pine needles)
- Selection of collage-making materials (magazines, newspapers, old maps, old paintings, wrapping paper, photographs, flyers)
- Selection of other art-materials (pencils, pens, inks, paints and paintbrush, crayons and/or charcoal)
- Scissors
- PVA and brush and/or glue stick
Take care
- Wash your hands after collecting natural materials
- Use scissors mindfully
- Wash your brushes, jar and palette after use
What you'll do
- Find somewhere comfortable to work from, set down your tablecloth, and surround yourself with your selection of art materials.
2. If you have already thought of your magical place, make a list of its special features and any parts you’d like to add to your map. Think about how you get there, what stories could be told there, or images you could make.
3. Lay down your large sheet of paper out in front of you – you’re going to fold it to create your zine.
4. Fold it in half length-ways.
5. Now fold it in half again width-ways and length-ways.
6. Open your paper up until you see the mark of a ‘cross’ shape where you folded it.
7. Cut the paper along the folded edge, stopping halfway when you meet the centre of the folded ‘cross’.
8. Open your paper completely and fold along the middle length – you’ll notice you have a slit in the middle of your paper.
9. Carefully push both sides of your paper inwards, so that the slit in the middle of your paper becomes a wide diamond shape.
10. You can now fold your zine to form pages. At this point, you’ve made a booklet, which when opened, will become a map!
11. Now, open your zine completely, so it becomes a flat sheet of paper again with a slit in the middle.
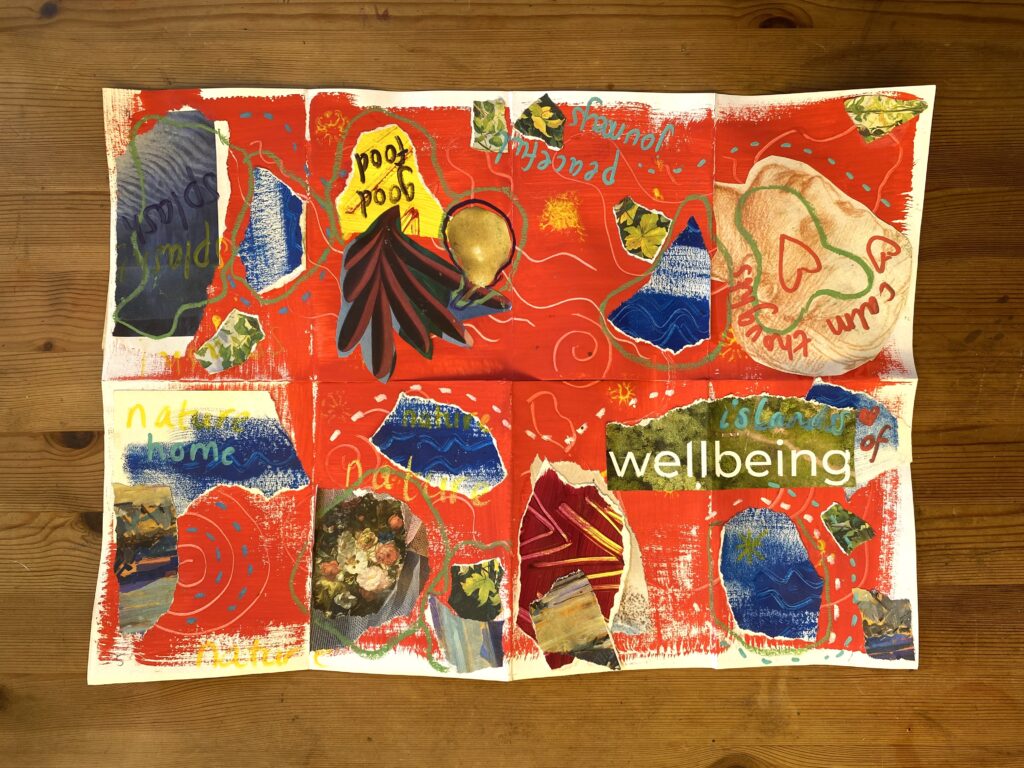
12. Choose a bright base colour from your paint selection and, using your paintbrush, cover the entire piece of paper on one side – this will become the ‘ocean’ on which you will add land and other features.
Top tip: You could choose a traditional bright blue for the sea, or go with a vibrant red, orange, yellow or green… you can play around with colour.
13. While the paint is still wet, use your natural tools to experiment with making marks – a technique known as ‘sgraffito’. Try making waves and whirlpools, the edges of land and outlines of islands, sea creatures or monsters, words and patterns.
Top tip: Try dragging a stick through the paint to draw waves, dab a pinecone dipped in another colour to add patterns, or make a natural paintbrush with a handful of pine needles and use this to scratch through the paint with a different colour.
14. When finished, set aside to dry.
15. Next, you’re going to create some interesting textured patterns with your other paint colours and smaller sheets of paper. (You’ll use these as the next surface layers of your map.)
16. Using your brush, apply different colours of paint to each piece of paper and then experiment with making marks with your natural tools.
17. Set these smaller sheets of paper aside to dry.
18. Take time to create other visual elements of your map by looking through your selection of collage-making materials.
19. If you made a list at the start, you could reflect on this to help you select your images. These could be pictures or symbols that represent your special place, you like, or help you feel calm. You could also choose words and sentences that bring meaning to your map.
Top tip: Play with scale – it’s key in map-making! A large face could become an island. Use different colours for seas, rivers, mountains, and cities. Add details like monsters, mythical creatures, animals, or boats to bring your map to life.
20. Cut or tear out your selected collage pieces and set them aside.
21. Once your zine (the large sheet of paper) is dry, fold it back up along the fold-lines. This ensures your zine can be experienced and viewed as both a large map (a single work of art) and a book of several pages.
Top tip: While folded, you could annotate each page, adding a page number, an F (for front page) or a B (for back page) at the bottom of each one with a light pencil mark. This will help to remind you of each page and which way up it will be viewed when your zine is folded back up.
22. Open your zine back up and lay it out flat, so you can see the fold lines where each ‘page’ would be.
23. Now, taking your smaller sheets of painted paper, tear these up to create the shapes and forms of land. Place them within each of the folded pages so that you start to build a map that can be viewed as both a whole artwork and as individual pages within the zine.
24. Add your selected collage elements. Move them around and in between your torn painted pieces of paper, layering them up and exploring how all these individual items work together.
25. Once you’re happy with how your artwork looks, start sticking things down with glue.
26. When the glue has dried, you can use any other art materials to add hand-drawn elements or writing to your zine. This is the opportunity for you to finish telling the story of your special place.
Top tip: You can work on this activity in your own time, taking breaks between each element and returning to your zine when you want to add something new. Remind yourself to enjoy the process and that there’s no hurry to finish! You can tell yourself that maps, stories and collage involve multiple layers, which require us to slowly pay attention to each part.
27. Once you feel you have completed your zine, you can present it standing up as a book or unfolded as a whole artwork.
You could also try…
Stitching through parts of your zine using coloured threads and a needle, adding more texture and further details like pathways.
Video guide
Watch a step-by-step video guide of the ‘Unfolding Adventures’ activity.