Creative activity:
Winter Wheel
The Norwegian word for Christmas is Jul, which means ‘wheel’. This tells us that time isn’t fixed, and that the darkness of winter will, like a wheel, turn and give way to the light of spring.
Process: Mandala; Land Art
Create your own Winter Wheel using the ancient art of a mandala, meaning ‘circle’ or ‘enclosure’ in Sanskrit.
A mandala represents the circle of life and is used as a universal symbol to express that everything is connected. For thousands of years, the process of making mandalas has helped people to focus their attention, helped people meditate and supported their wellbeing.
You can work indoors or outside. You could make your mandala a permanent artwork or an ephemeral (lasting for a short time) piece of land art.
Want to find out more about land art? Check out Tate’s website.
What you'll need
- A selection of natural materials of your choice (branches, pinecones, conkers, stones, leaves, twigs, grasses, flowers, berries, acorns, shells and seaweed all work well).
- A piece of card (if sticking down your mandala and making a permanent artwork)
- PVA glue and brush (as above, if making a permanent artwork)
- Camera or phone with camera (optional, if you want to photograph a temporary mandala made either indoors or outside)
Take care
- Wash your hands after collecting natural materials
- Wash your brush and glue pot after use.
What you'll do
- Decide where you want to work (inside or outdoors) and whether you’d like to make a temporary or permanent piece of art.
Top tip: Whether you’re working indoors or outside, find a peaceful place to create your mandala.
2. Bring together your natural materials.
Top tip: If you decide to work outdoors, you could select your natural materials from around the site you intend to create your mandala.
3. Choose a background for your mandala. This could be card, paper, fabric, or even a combination of materials and textures.
4. If working indoors, place your chosen background material in front of you and made your selection of natural materials accessible.
Top tip: If using cardboard, you could recycle some and see how that works.
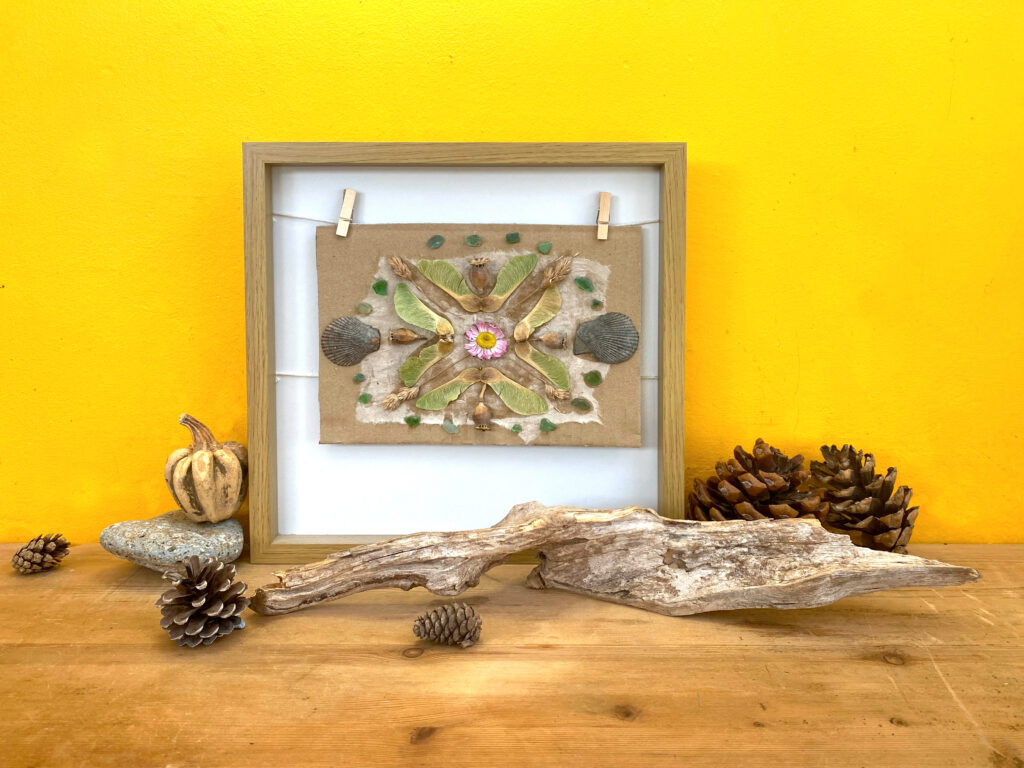
5. Glue down a meaningful natural object (e.g. a flower) on the centre point of your cardboard – this is your ‘unifying centre’, and it makes the mandala significant and personal to you.
Top tip: If it helps, use a pencil to make a dot where your centre point is and to draw a faint circle as a guide for your mandala shape.
6. Working out from this centre point, slowly and mindfully use your other natural materials to form the rest of your mandala. Place items near the centre and then continue moving outwards in an ordered pattern until you’ve created a circular design.
7. Continue this process until you feel your mandala looks complete.
8. Once you have your mandala items arranged, you can now start to carefully glue them down.
9. If you decide to make a temporary mandala (either indoors or outside), you could photograph it, capturing this moment of making.
Top tip: If making a permanent mandala, you could frame it once it is dry.
10. Once you have finished your mandala, place it somewhere special where you can enjoy it!
You could also try…
If you created a permanent mandala, why not try making a temporary one next time? You can rearrange and reuse your natural materials again and again. Alternatively, if you worked indoors this time, try creating one outside.
Video guide
Watch a step-by-step video guide of the ‘Winter Wheel’ activity.